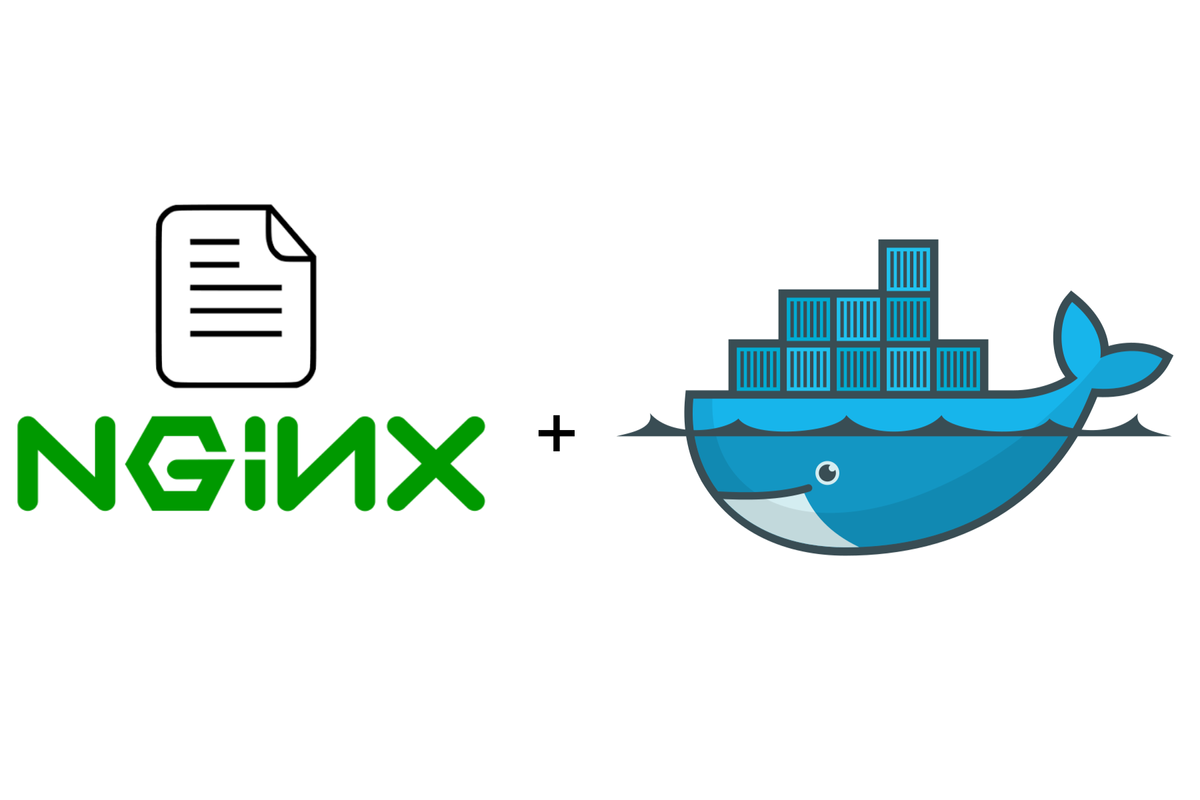
How to Setup NGINX Alpine for Lightweight Static Files on Docker
Learn how to setup a lightweight NGINX-Alpine docker container to serve static files and static websites using your own domain name on Docker Compose

Overview
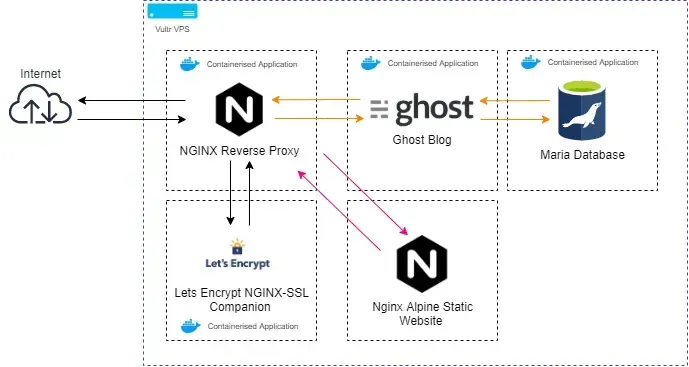
Set up a lightweight nginx:alpine docker container that can serve both static files such as images and static websites.
Before you begin
Here's a bit of an overview of what we're building to store static files:
Folder Structure
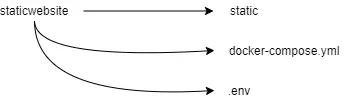
First off, let's set up the folder structure - we need a new folder, which I'm going to call 'staticwebsite' with a subfolder called 'static'.
- The static subfolder will contain all of the static assets you wish to host on your website.
- The staticwebsite folder contains the static subfolder and the docker-compose.yml folder and the .env file.
- The .env file contains variables used for the reverse-proxy
Create the required folder structure using the following commands:
mkdir staticwebsite
cd staticwebsite
mkdir static
Just a note - moving forward, anything you put in the static folder will be publicly accessible.
Defining the service with Docker-Compose
Once you've created all the required folders let's jump straight and create the docker-compose.yml file that will allow us to define the service we want to spin up.
nano docker-compose.yml
version: '3'

services:
  nginx:
    image: nginx:alpine
    container_name: fileserver
    expose:
      - "80"
    env_file:
      - .env
    volumes:
      - /home/akg/staticwebsite/static:/usr/share/nginx/html:ro
    networks:
      - proxy
    restart: unless-stopped

networks:
  proxy:
    external:
      name: nginx-proxy
Yaml file for deploying the alpine Nginx file
let's break this down a bit to understand what we're defining:
- We're using nginx:alpine as the docker image, this is a lightweight version of Nginx which is lightweight enough for me to host static files.
- I've updated the container_name to fileserver just so it's easier for me to keep track of when you list all of the running docker images
- I'm exposing port 80 which is the port that this docker image will communicate on with the host.
- I'm specifying an environment file env_file - .env which contains information that my Nginx reverse proxy container requires to forward requests onto the container. If you're yet to setup the reverse proxy check out the first post in this series
- I'm exposing the static folder we created earlier as the folder that will be mounted into the docker container's Nginx/HTML folder. This will expose anything in that folder to the web.
- We're attaching the docker container to the proxy network so it can talk to the reverse proxy. This will make the website accessible to the web.
Setup the Docker-Compose .env file
Making sure you're in the same static-website folder let's set up the .env file. This file is used to store various attributes for the docker file that we need for the reverse proxy to pick up the container and forward traffic to it.
nano .envVIRTUAL_HOST=static.alexgallacher.com
VIRTUAL_PORT=80
LETSENCRYPT_HOST=static.alexgallacher.com
[email protected].env variables to spin up the static website server alpine
let's break this down a bit to understand what we're defining:
- The VIRTUAL_HOST & VIRTUAL_PORT specify to the reverse-proxy that we want to set up this docker-image with the domain of static.alexgallacher.com When someone hit's the URL of https://static.alexgallacher.com the reverse-proxy will know to forward the request to this container over port 80. This is port 80 and not 443 as our SSL demarcation point is handled by the reverse-proxy container at the edge of the VPS.
- The LETSENCRPYT_HOST & LETSENCRYPT_EMAIL values are used for the reverse proxy to register an SSL certificate against the https:// static.alexgallacher.com URL and my registered email address.
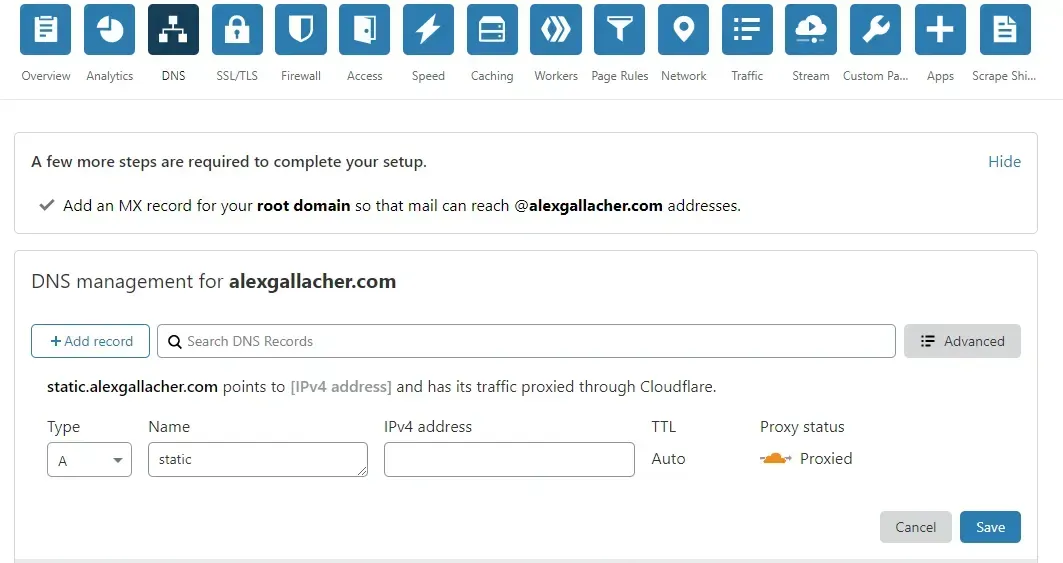
Setup Cloudflare
The DNS setup is relatively straightforward. You'll need to point the URL that you defined, in my case, this is static.alexgallacher.com to the IP address of your VPS with the use of an A record.
It's worth noting DNS changes are typically fast to update with Cloudflare but have been known to take some time. If the website is not resolving I would suggest pouring a ☕ and coming back to it a bit later.
Firing up the Docker image
Alright, we're almost done. Let's spin up the docker image by using the following command in the staticwebsite folder:
docker-compose upIf you wish to run the image in detached mode once everything is set up and running, simply append -d to the end of the command:
docker-compose up -dYou'll need to wait a minute or two as Docker will download the nginx:alpine container. Once the container has spun up the revere-proxy will detect that a new docker container has started and will attempt to register an SSL certificate for the container and will refresh itself to start forwarding traffic.
Conclusion
Once you're done, browse to your subdomain with the file name, e.g. static.alexgallacher/alex.png and see if it works!